Published on Dec. 19, 2019
Hatchery Process
A good start is critical to the long-term growth and survival of the fish. As fish are most susceptible to disease and mishandling during the early-rearing stages, it is imperative that you utilize your best water in your hatchery system.
Hatchery water should always be “first-use”, preferably from an isolated, uncontaminated spring or well (borehole). Stream or river waters may often become turbid with fine particles and such conditions are not ideal for hatching eggs or rearing alevins.
If stream or river water is used, then it is recommended that some form of filtration is included at the intake point in the hatchery design. Ideally, hatchery systems should be flow-through (single pass) and utilize cold, pathogen-free water.
The use of re-circulated water in hatcheries is generally increasing in the industry. Under these circumstances it is essential to ensure good filtration and sustained oxygen levels as per the recommended water parameters in the following sections.
Filtration
If there is any possibility of the incubating water becoming turbid it is recommended to use some form of filtration before the water enters the incubators and particularly the early rearing ponds. Suspended solids (even very fine solids) should be avoided as they are harmful to the gills of the alevins and can cause various complications and mortality. Various filters are available, including sand and micro-screen drum filters as pictured. If hatchery is using recirculation or there is the possibility of any bacterial contamination of the inlet water, the use of ultraviolet or ozone treatment should be considered.
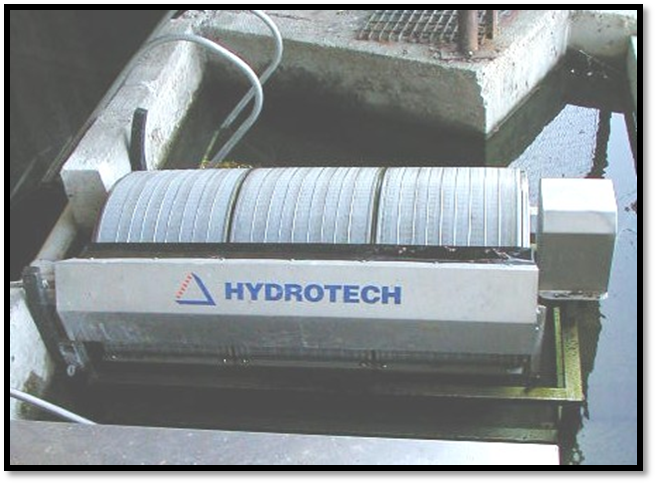
Microscreen Drum Filter
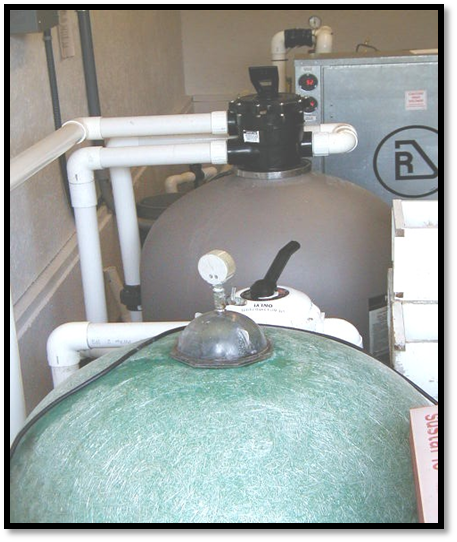
Sand Filter
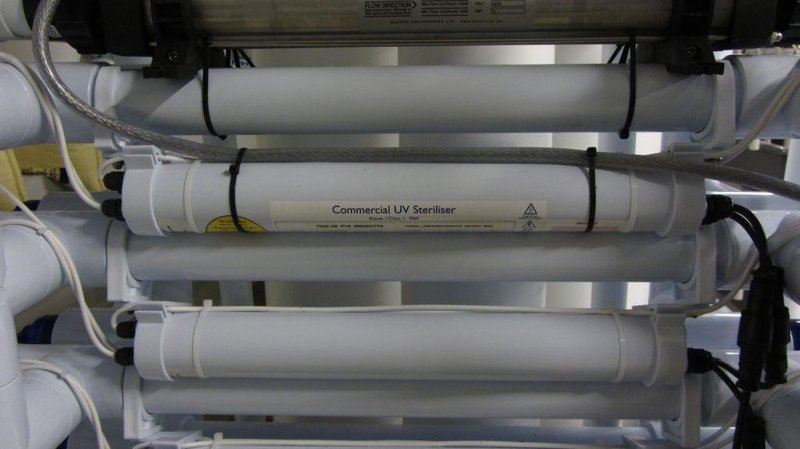
Ultraviolet Treatment Filter
Water quality parameters
The following are the optimum water quality parameters for incubating eggs, hatching eggs and early stages of the alevin life cycle:
- Temperature. The ideal range of incubating and hatching eggs is 8 – 12⁰ C (46 - 54⁰F) although temperatures of 4 - 19⁰ C (39 - 66⁰F) are tolerable for short periods.
- Dissolved oxygen. The oxygen levels should be at > 95% in the incoming water and > 75% exiting the eggs or alevin ponds.
- pH should be in the range 6.7 – 8.0
- Dissolved gas. (Nitrogen) should be < 105% or problems with gas super-saturation or “gas bubble disease” is likely to occur.
- Alkalinity/Hardness. The alkalinity should be > 75mg/litre.
- Chemicals and minerals. There should be either a complete absence or only a trace amount of contaminants such as ammonia, cadmium, chlorine, copper, hydrogen sulphide, lead, mercury and zinc.
- Light levels. All incubation and hatching of eggs should be done in low light levels to avoid disturbance of alevins.
Water flows for hatching eggs
Different hatching systems may demand different water flows but as a general rule, a minimum flow of 4-6 litres per minute per 100.000 eggs at temperatures below 15⁰C (59⁰F ) is recommended to provide adequate oxygen.
The oxygen saturation of water is dependent on temperature so, at temperatures above 15⁰C (59⁰F), the flow should be increased. The oxygen levels should be monitored and should not fall below 6 ppm (parts per million).
The amount of water flowing through eyed eggs should not be excessive to move the eggs too rapidly or violently. Agitation or slight “tumbling” of the eggs in the incubators is useful to remove/wash off egg shells when the alevins start to hatch.
Main methods for incubation and hatching eyed eggs
Once you have gone through the steps of receiving and counting the eggs, it is time to introduce them into your incubation units. As with all steps in the hatchery process, this should be done with great care by trained personnel only. Multiple incubation systems exist and finding one that is reliable, efficient and best fits your resources and needs is important.
The three most common types of incubators are:
- Vertical incubators (“Heath trays or stack”).
- Horizontal incubators (“California baskets or trays”)
- Upwelling incubators (“Jars”)
Vertical Incubators (“Heath trays or stack”)
There are a variety of vertical incubators available. Most modern vertical incubation systems are constructed from GRP (Glass Reinforced Plastic) or reinforced non-toxic plastic and are durable, easy to clean and disinfect.
The most commonly used is the “MariSource” system as illustrated. The principal of a vertical incubation system is that water enters a channel in the top tray, upwells through the egg tray and flows over the front wall into a channel which feeds the next lower tray unit and onwards to the last tray.
For hatching eggs, it is recommended that the eggs are placed no more than 2 layers deep in each tray or approximately 12500 – 15000 eggs per tray.
Advantages of the vertical incubation system include:
- Excellent use of available floor space as most units may be stacked 8 or 16 trays high,
- Efficient use of water supply,
- Ability to isolate individual batches or to remove individual trays for monitoring or management.
- Safety of eggs and newly hatched alevins as trays are covered by a screen mesh to prevent eggs or alevin being washed out.
- More efficient uptake of yolk sac and heavier point of feed fry.
Disadvantages of the vertical incubation system include:
- Once alevins start to swim up for first feeding they must be removed to tanks or ponds.
- Requires cleaning and management of eggs including removal of dead eggs.
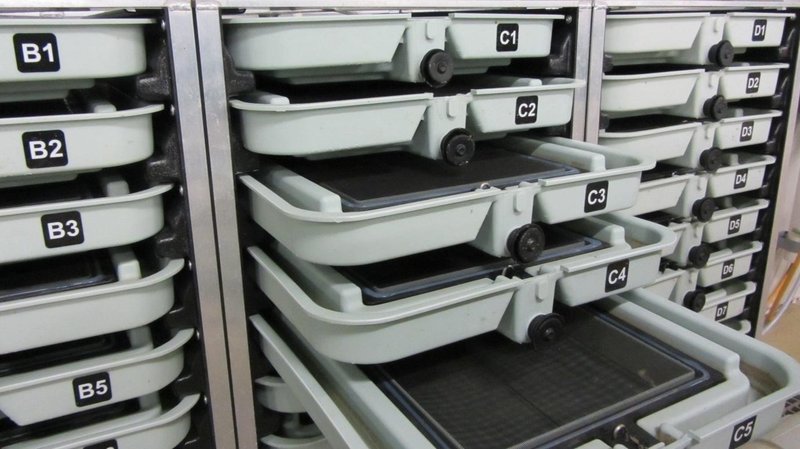
Vertical incubation system
Horizontal Incubators (“California baskets or trays)
There are a variety of commercial horizontal incubators available. As with the vertical incubators these are usually made from GRP or reinforced non-toxic plastic.
The principal of a horizontal incubator is that baskets (trays) are placed in a trough in series (one after the other). The number of baskets per trough may vary according to hatchery space and water flows, but usually 4 – 8 baskets are placed in each trough.
The floor of the baskets are screened and sit off of the bottom of the trough. At the end of each basket is a partition that extends to the trough bottom. The reason for this is to force the water upwards through the eggs. It is essential that the sides of the baskets fit tightly in the trough to prevent water flowing around the side of the basket, and that the baskets are orientated in the correct direction with regard to water flow.
The mesh size in hatching baskets should be suitable size to allow newly hatched yolk sac fry to fall though the mesh into the trough below. Once hatching is complete the baskets are simply lifted out with any remaining dead eggs and eggshells. The hatched alevins can then absorb remaining yolk sac, swim up and commence feeding in the same trough.
Advantages of the horizontal system include:
- Ease of use,
- Inexpensive and may be custom built on site,
- Ability to see, monitor and work with eggs easily,
- Efficient use of water supply,
- Ability to hatch eggs in same tanks for hatched alevin and first feeding,
Disadvantages of the horizontal system include:
- Requires more space than other systems
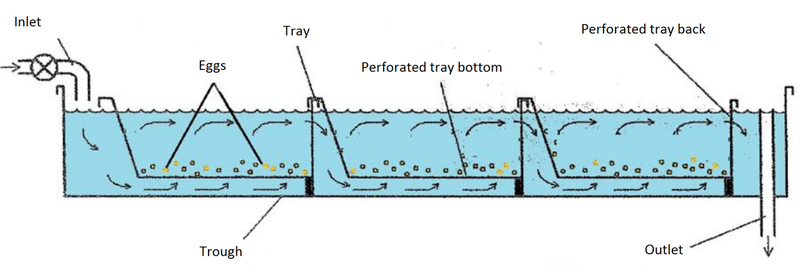
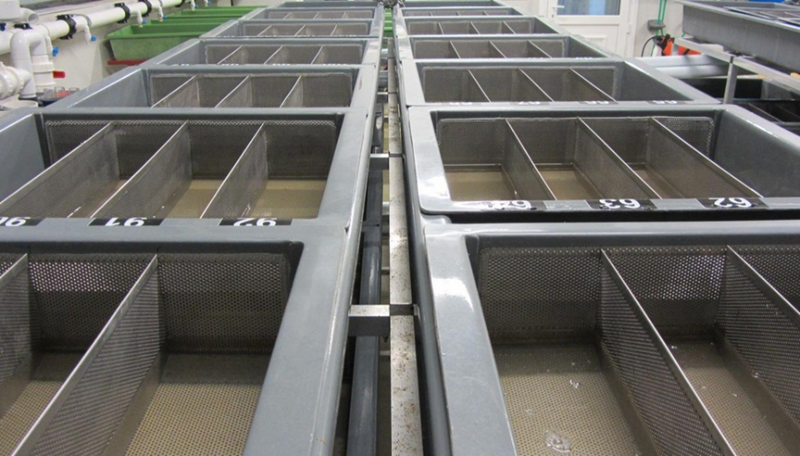
Horizontal incubation system
Upwelling Incubator Systems (“Jars”)
Historically upwelling incubators were used primarily for the incubation of eggs until the “eyed” stage. However, upwelling incubators can be used for the hatching of eggs.
Upwelling jars are designed so that the water flows in from the bottom and out of the top. It is the upwelling water that delivers oxygen to the eggs, and it is very important that this water flow be equally distributed throughout the jar. This is usually achieved by placing some form of diffuser mechanism beneath the eggs (usually a plate, porous pad, or marbles).
Alevins can be maintained in these incubators almost until the time of swim-up. The upwelling incubators are placed in the rearing tanks and when the fish become more active the majority will swim out on their own while the remainder will need to be poured out.
Pouring the remaining alevins needs to be done gently and with extreme care to ensure that the young alevins are not harmed. The water height in the trough into which the alevins will be reared should be ½ the height of the upwelling incubator so that alevins swimming or washed out are not harmed by the fall.
Upwelling hatching jars maintain adequate circulation by using the water flow to partially suspend the eggs. When hatching eggs, upwelling incubators should contain no more than two -thirds of the total incubator volume in eggs. The flow rate in upwelling units should be adjusted so that eggs are suspended approximately 50% of their static depth (i.e., if eggs are 10 cm deep with water off, they should be approximately 15 cm deep with water flowing).
Advantages of the upwelling incubation system include:
- Ease of use,
- Self-cleaning and removal of dead eggs and egg shells with outflow,
- Labour saving,
- Hatches eggs in rearing tanks
Disadvantages of the upwelling incubation system include:
- Constant monitoring of flow rates is required to ensure eggs are suspended at correct level,
- Possible loss of alevins due to air bubbles or uncontrolled flow increase,
- Potentially high levels of alevin stress
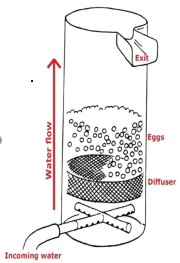
Basic diagram of upwelling incubator
Regardless of incubation system used it is important to care for the eggs during the final stages of their incubation and hatching process. This includes-
- Monitoring the water flows to ensure that the eggs are being provided with adequate oxygen. The oxygen levels should be regularly monitored and maintained at the recommended levels.
- Dead eggs provide a substrate for fungal infection, so daily inspection and removal of dead eggs is essential. Specially designed egg “tweezers” or a suction bulb and pipette are the best ways of removing dead eggs or fungus as these can be used with minimal disturbance to the live and healthy eggs or newly hatched yolk-sac fry.
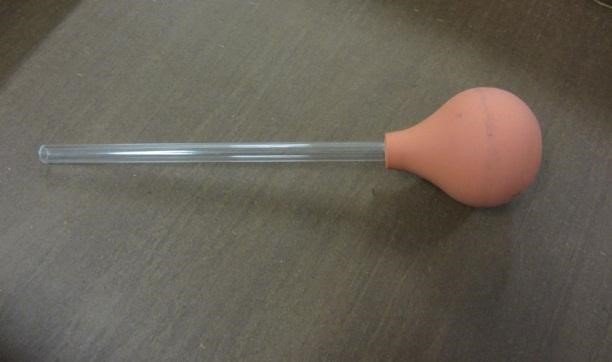
Suction bulb and pipette
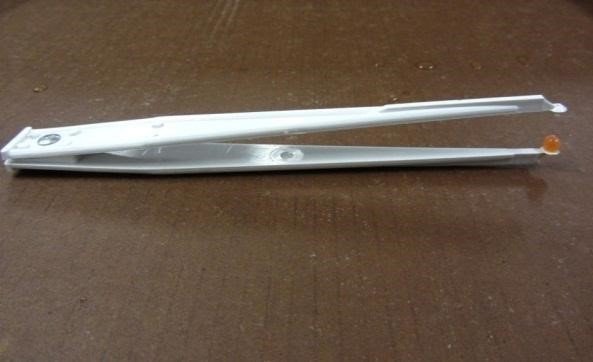
Egg tweezer